DIY sounds like the money-saving move… until you’re standing in the aisle staring at screen rolls, lumber, and hardware thinking, “Why is everything expensive now?”
The good news: a DIY screened porch can still be a smart value, but only if you budget the right way. Most DIY cost surprises happen for one reason: homeowners price the screen, but forget the “everything else.”
Here’s a clear breakdown you can actually use.
Step 1: Decide what “DIY” really means for your project
There are two DIY paths:
A) Screen in an existing covered porch
This is the most realistic and affordable DIY route because the roof and structure already exist.
B) Build a new porch AND screen it in
This is a much bigger job with more structural requirements, and the budget climbs fast.
If you’re doing B, your “screening cost” is only a small part of your total.
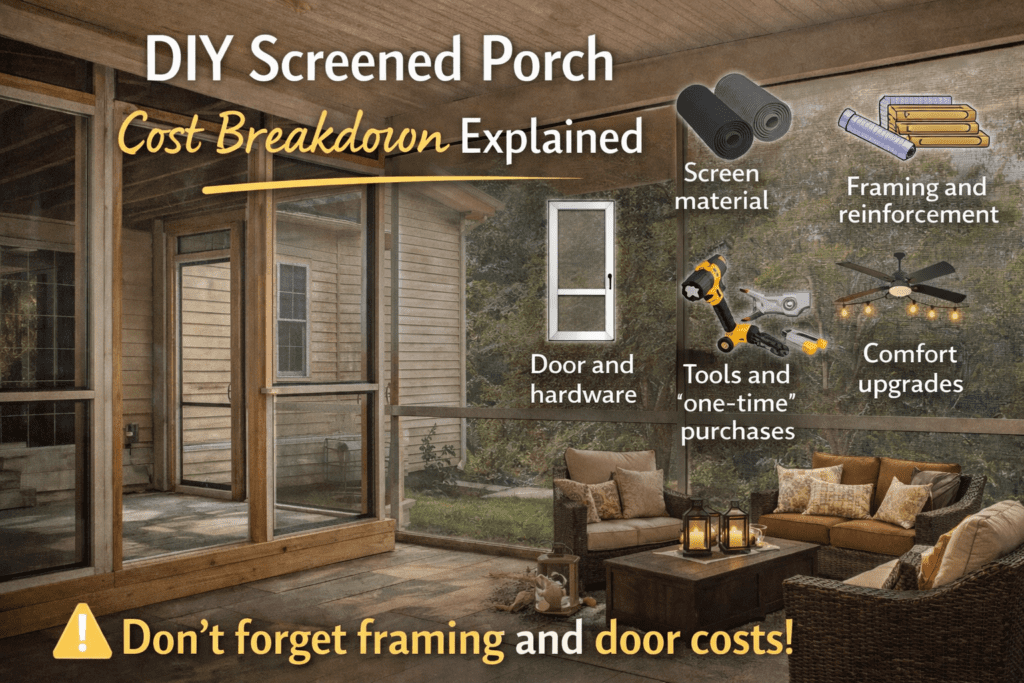
DIY Screened Porch Cost Categories
1) Screen material
For many homeowners screening in an existing porch, screen materials often run about $3–$5 per square foot (materials only).
Your final material cost depends on:
- screen type (standard vs heavy-duty vs high-visibility)
- how many openings you’re screening
- how much waste you’ll have from cutting
Budget tip: measure twice and plan panel sizes before you buy. Extra rolls add up.
2) Framing and reinforcement
Even if you already have a porch, you may still need framing to create screen panels and support a door.
Common DIY framing costs come from:
- lumber for new frames and braces
- fasteners (exterior-rated screws, brackets, anchors)
- trim boards for clean edges
Where homeowners get surprised: door openings. Doors need stronger framing than screen panels.
3) Door and hardware
If your door sags, sticks, or has gaps, you will feel it every single day.
Budget for:
- the screen door itself
- hinges and handle set
- latch hardware
- weather stripping to reduce gaps
Reality check: the door is the most-used part of the porch, so it’s also the first thing to annoy you if it’s cheap.
4) Tools and “one-time” purchases
DIY costs are not just materials. If you don’t already own the right tools, you’ll spend here.
Typical tool costs may include:
- staple gun or screen spline tool (depending on system)
- utility knife blades, snips
- measuring tools
- ladder or scaffolding access
- safety equipment (gloves, glasses)
Budget tip: borrow or rent tools you’ll only use once.
5) Comfort upgrades
A lot of DIY screened porches get built… and then barely used because they’re still hot and awkward at night.
Smart comfort add-ons:
- ceiling fan support (if your porch is wired and rated)
- warm lighting
- outdoor rug (instant “room” feel)
- storage bench for cushions
Keep it simple. Your goal is “easy to use,” not “perfect.”
6) The hidden line item: repairs to the existing structure
If you’re screening in an older porch, you may discover:
- soft wood near corners
- loose posts or railings
- out-of-square openings
- spots where water has been sneaking in
DIY screening only works well when the structure is solid and straight. If it’s not, fixing that becomes part of the budget.
A realistic DIY cost anchor
If you’re screening in an existing porch, many homeowners find kits or basic DIY screening projects often land around $2,000–$4,000 depending on size and materials.
That’s not a promise, but it’s a helpful reality check for planning.
The best way to budget DIY without stress
Use this simple approach:
- Measure your openings (total square footage of screen area)
- Pick your screen type (basic vs durable vs high-visibility)
- Add framing and trim (don’t skip this)
- Add door cost (and don’t cheap out)
- Add a buffer for “oops” purchases (extra screws, extra roll, replacement hardware)
If you budget like that, DIY stays fun instead of frustrating.
K&K Exteriors: Discover Custom Patio Covers & Screen Rooms in Augusta
Contact K&K Exteriors: Schedule Your Estimate for Exterior Improvements: Get a Screen Porch Estimate in Augusta